Aztec Master Flashing Fixing Kit – Standard SK1 (Small / Models Mini – No 2)

£12.50
Aztec Master Flash Fixing Kit – Standard
Complete Installation Kit for EPDM Roof Flashings Models MINI, No1 & No2
Everything you need to install your Aztec Master Flash quickly, securely, and correctly
Aztec Master Flash Fixing Kit – Standard
Complete Installation Kit for EPDM Roof Flashings Models MINI, No1 & No2
Everything you need to install your Aztec Master Flash quickly, securely, and correctly
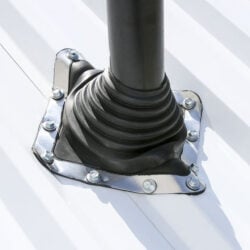
The Aztec Master Flash Fixing Kit is a complete installation solution designed specifically for fitting EPDM roof pipe flashings to a wide range of roof types, including metal, slate, tile, and profiled sheets.
Each kit contains all the essential components required to achieve a secure, watertight seal, helping to ensure long-lasting performance and a clean, professional finish.
Suitable for both new installations and retrofit applications, this kit removes the need to source individual fixings separately — saving time on site and ensuring compatibility with your flashing.
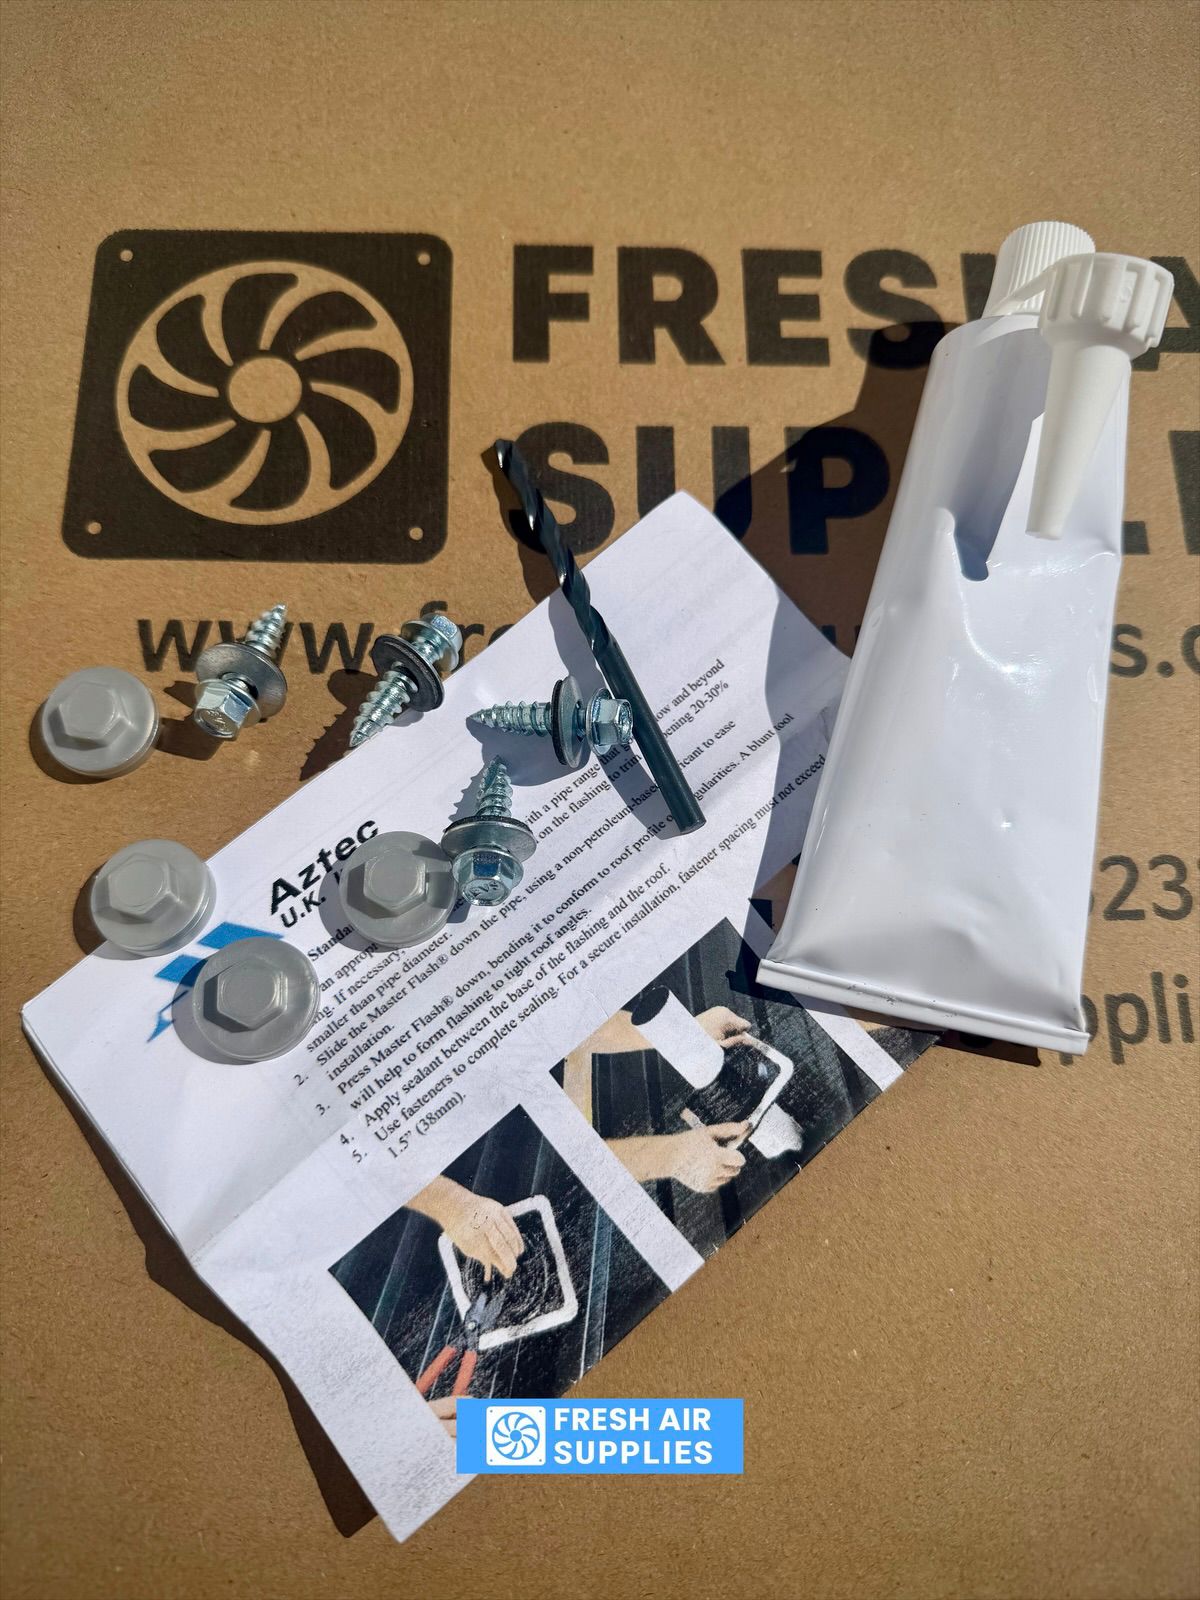
What’s Included?
Each fixing kit contains:
- 1 × 80ml Clear Silicone Sealant
- 10 × SP Screws (6.3 × 25mm)
- 10 × Bonded Washers for a watertight seal
- 10 × Silver Cap Covers for a neat finish
- 1 × Drill Bit (for correct pilot hole sizing)
- 1 × Installation Instruction Leaflet
Where Is It Used?
The Aztec fixing kit is used when installing EPDM Master Flash pipe flashings onto:
- Metal roofs and cladding
- Slate and tiled roofs
- Corrugated and profiled roof sheets
- Wall penetrations and side panels
It ensures the flashing is properly sealed and securely fixed to prevent water ingress.
Key Features
- Complete Installation Kit
Everything required for fitting your flashing in one pack - Secure & Watertight Fixing
Screws with bonded washers provide a tight, reliable seal - Clean, Professional Finish
Silver caps cover fixings for a tidy appearance - Easy Installation
Includes drill bit and instructions for straightforward fitting - Compatible with small Aztec Master Flash Models MINI, No1 & No2
Which Kit Do I Need?
We offer two fixing kit options depending on the size of your flashing:
Fixing Kit Selection Guide
MINI, No.1 & No.2 → Standard Fixing Kit (SK1)
No.3 and above → Master Fixing Kit (SK2)
| Model | Pipe Diameter | Base Size | Fixing Kit Required |
|---|---|---|---|
| MINI | 3–19mm | 57 × 57mm | Standard Fixing Kit (SK1) |
| No.1 | 0–70mm | 114 × 114mm | Standard Fixing Kit (SK1) |
| No.2 | 22–101mm | 152 × 152mm | Standard Fixing Kit (SK1) |
| No.3 | 0–146mm | 203 × 203mm | Master Fixing Kit (SK2) |
| No.4 | 70–177mm | 254 × 254mm | Master Fixing Kit (SK2) |
| No.5 | 101–209mm | 279 × 279mm | Master Fixing Kit (SK2) |
| No.6 | 121–254mm | 304 × 304mm | Master Fixing Kit (SK2) |
| No.7 | 140–292mm | 355 × 355mm | Master Fixing Kit (SK2) |
| No.8 | 171–343mm | 431 × 431mm | Master Fixing Kit (SK2) |
| No.9 | 241–520mm | 635 × 635mm | Master Fixing Kit (SK2) |
| MAXI | 304–724mm | 864 × 864mm | Master Fixing Kit (SK2) |
| MAXI XL | 304–1000mm | 1100 × 1100mm | Master Fixing Kit (SK2) |
Using the correct kit ensures adequate fixing strength and proper sealing across the full base of the flashing.
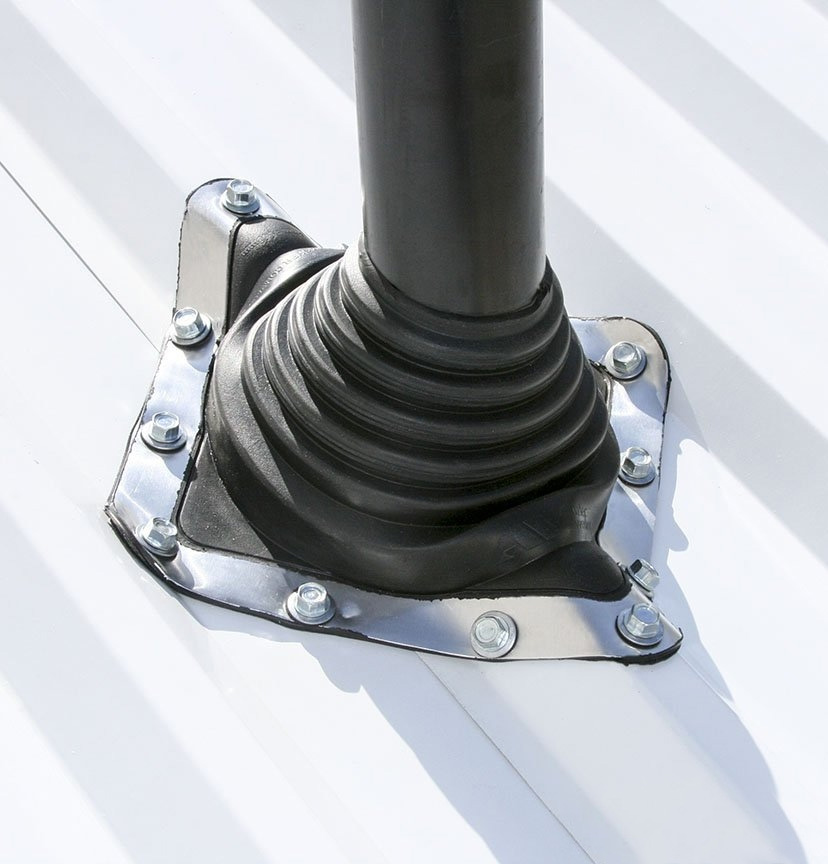
Installation Made Simple
- Position the flashing over the pipe and form the base to the roof profile
- Apply sealant to the underside of the base
- Fix in place using the supplied screws and washers
- Cover fixings with silver caps for a clean finish
Why Use a Dedicated Fixing Kit?
Using a purpose-designed fixing kit ensures compatibility with your flashing and helps avoid common installation issues such as leaks, loose fixings, or poor sealing.
It’s a simple way to ensure the job is done right first time.
Need Help?
If you’re unsure which kit you need for your flashing size, get in touch — our team will be happy to advise.