

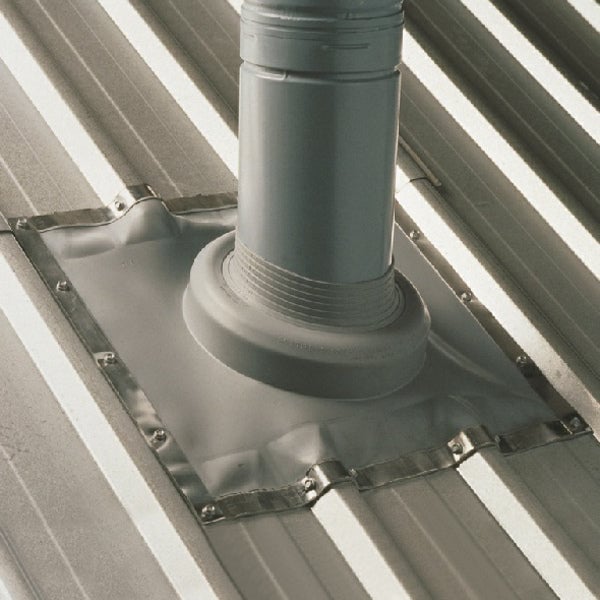
What Size Roof Pipe Flashing Do I Need? (Complete Guide from 3mm to 1000mm)
Choosing the correct roof pipe flashing size is one of the most important parts of getting a watertight seal on your roof.
Get it right, and installation is straightforward.
Get it wrong, and you’re dealing with leaks, wasted time, and wasted product / replacement costs.
In this guide, we’ll break down exactly how to choose the right EPDM roof flashing — including pipe diameter, base size, and which fixing kit you’ll need.
Step 1 – Measure Your Pipe Correctly
Before anything else, you need to measure your pipe properly. Always measure the external diameter of the pipe
Do not go by the internal bore, the nominal duct size or the labelled size. There shouldn’t be much variation in these sizes but its best to do it correct way the first time, measure the external diameter.
Step 2 – Match Your Pipe to the Correct Flashing Size
EPDM roof flashings are designed with a cut-to-fit cone, meaning each flashing covers a range of pipe sizes. You simply select a flashing where your pipe diameter falls within the range, then trim it to suit.
Small Penetrations (3–70mm)
Typical uses:
- Cables
- Solar panel wiring
- Small vents
Recommended models:
Medium Sizes (70–200mm)
Typical uses:
- Soil vent pipes
- Bathroom extract fans
- Kitchen ventilation
These are the most common sizes used for HVAC domestic and commercial jobs. They cover the most common duct / pipe sizes of 100mm, 125mm, 150mm, 160mm and 200mm.
Recommended models:
Large Sizes (200mm and above)
Typical uses:
- HVAC ducting
- Commercial flues
- Industrial ventilation systems
These are for duct and pipe diameters that exceed 200mm right up to extra large sizes of duct such as 560mm, 710mm and more.
Recommended models:
- No.6 (121–254mm)
- No.7 (140–292mm)
- No.8 (171–343mm)
- No.9 (241–520mm)
- MAXI (304–724mm)
- MAXI XL (304–1000mm)
Step 3 – Understanding Base Size (Often Overlooked)
The pipe diameter isn’t the only thing that matters — the base size of the flashing is also important.
Larger flashings come with larger bases to:
- Provide proper coverage on the roof surface
- Seal effectively over corrugations or uneven profiles
- Prevent water ingress at the edges
For instance, a 100mm duct or pipe can be with models No2, No3, No4 and No5 because their ranges cover 100mm. The next thing to consider would be the base size required for your job. If the base size is not a factor for your project, then go for the lower model number as it will be a cheaper option.
Roof Flashing Size Chart (Pipe Diameter & Base Size)
| Model | Pipe Diameter | Base Size |
| MINI | 3–19mm | 57 × 57mm |
| No.1 | 0–70mm | 114 × 114mm |
| No.2 | 22–101mm | 152 × 152mm |
| No.3 | 0–146mm | 203 × 203mm |
| No.4 | 70–177mm | 254 × 254mm |
| No.5 | 101–209mm | 279 × 279mm |
| No.6 | 121–254mm | 304 × 304mm |
| No.7 | 140–292mm | 355 × 355mm |
| No.8 | 171–343mm | 431 × 431mm |
| No.9 | 241–520mm | 635 × 635mm |
| MAXI | 304–724mm | 864 × 864mm |
| MAXI XL | 304–1000mm | 1100 × 1100mm |
Always make sure the base is large enough to sit securely on the roof and cover the surrounding area properly.
Step 4 – Which Fixing Kit Do You Need?
Choosing the correct fixing kit is just as important as choosing the flashing. We offer complete fixing kits to assist in the installation process.
Suitable for:
- MINI
- No.1
- No.2
Suitable for:
- No.3 through to MAXI XL
Using the correct kit ensures proper fixing across the full base, even pressure distribution and A reliable, watertight seal.
Step 5 – Common Mistakes to Avoid
These are the issues we see most often:
- Measuring the wrong size – Always use external diameter
- Choosing too large a flashing – Leads to poor sealing even after trimming
- Not trimming the cone properly – Cut slightly smaller for a tight fit (you can always cut more if you go too tight, but go too large and you compromise the seal).
- Skipping sealant – Sealant is essential for a watertight finish
- Using the wrong fixing kit – Larger flashings need more fixings for proper sealing
Step 6 – Basic Installation Overview
Installing an EPDM roof flashing is straightforward:
- Select the correct flashing size
- Cut the cone using the marked rings
- Slide the flashing over the pipe
- Form the base to match the roof profile
- Apply sealant underneath the base
- Fix in place using screws and washers
Why Choose EPDM Roof Flashings?
EPDM flashings are widely used because they offer:
- Excellent flexibility
- Long-term durability
- Resistance to UV and weathering
- Compatibility with most roof types
They’re a simple, reliable solution that works across domestic and commercial applications.
Final Thoughts
Choosing the right roof flashing size doesn’t need to be complicated. As long as you:
- Measure the pipe correctly
- Match it to the correct size range
- Use the appropriate fixing kit
You’ll get a secure, long-lasting, watertight seal.
Need Help Choosing the Right Size?
We understand that there is a large range to choose from. If you’re unsure which flashing or fixing kit you need, get in touch — our team will be happy to point you in the right direction.
Call: +44 (0) 28 8675 2336 | Email: sales@freshairsupplies.co.uk